
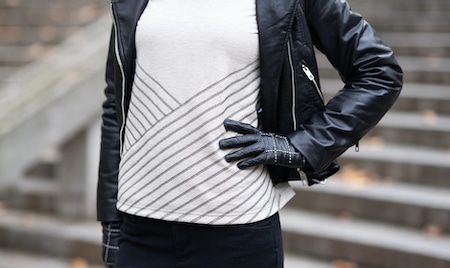
Inspirations
SEWING TUTORIAL:
“Hoodie“
![]() MATERIALS
MATERIALS
Fabric
- Depending on the size, between 2.00 m et 2.20 m in length by 140 cm in width (between 2.24 and 2.5 yards in length by 55 inches in width).
Threads
- 4 cones of polyester thread that match your fabric
- 1 cone of decorative thread for overlocking machines
![]() MACHINES AND ACCESSORIES
MACHINES AND ACCESSORIES
- elna eXtend overlock and coverlock machine. In this tutorial, we use the elna eXtend 864air and eXtend covermax
- Metal standard foot
- Clear-view foot (included with the standard accessories of the eXtend covermax)
Size
- 36/38 seam included
- 40/42 add to the pattern the sewing values
![]() PREPARE YOUR FABRIC
PREPARE YOUR FABRIC
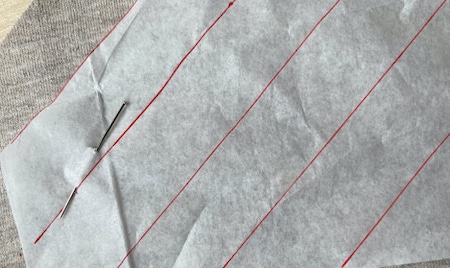
1.
The pattern includes a 1.5 cm (.6 inch) seam allowance. To customise your hoodie, you can add an additional seam allowance which you will later remove.
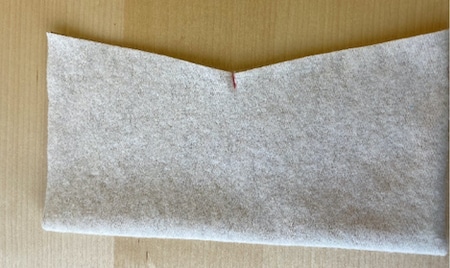
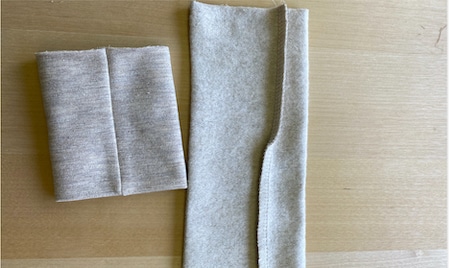
Fold your fabric in half right sides together.
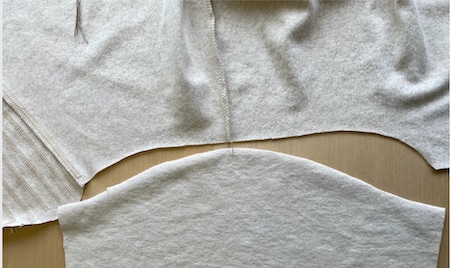
Duplicate and lay all pattern pieces, except for the three pieces at the front of the hoodie, which you will cut out once.
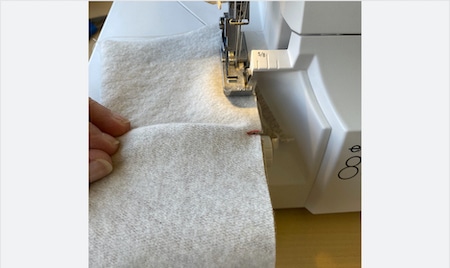
For the pieces that you will cut out once, lay your pattern on the right side of the fabric to mark the stitch markings. Then draw the lines using a ruler.
Over the other pieces, cut the edge to size and mark the markings before removing your pattern.
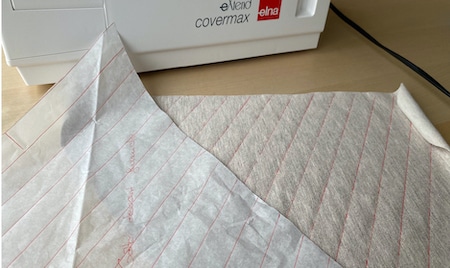
2.
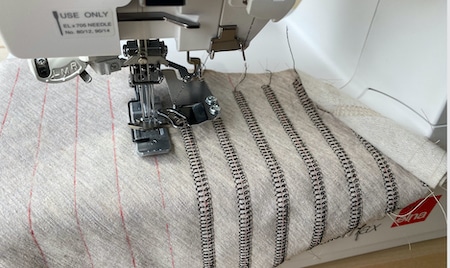
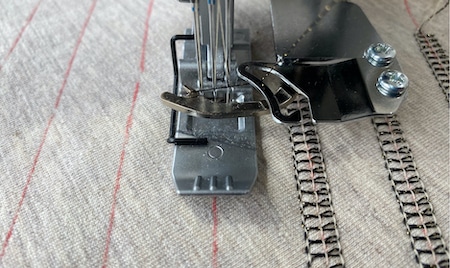
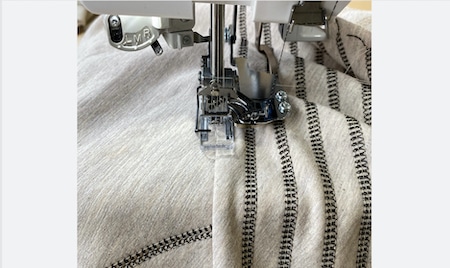
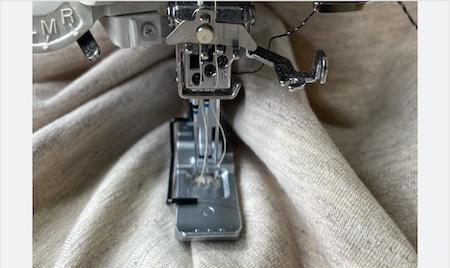
Set your machine to the triple top cover stitch.
Test first and adjust the stitch length according to the desired result and thickness of your decorative thread.
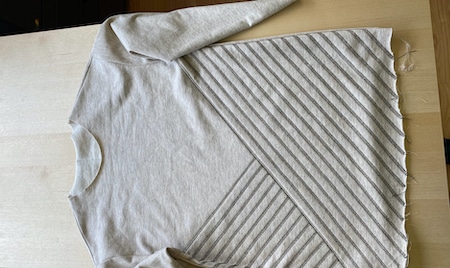
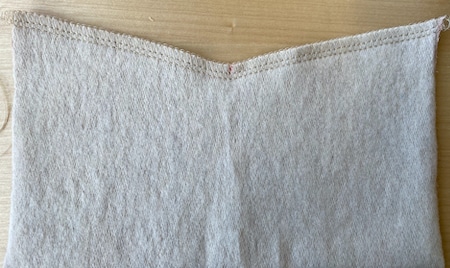
Sew the triple top cover stitch, over all the lines you have drawn, at the front of the hoodie.
For a perfectly straight seam, place the middle needle mark of your presser foot over the seam line.
You can also use the transparent presser foot.
After topstitching all lines, put the pattern back over the pieces to cut off the seam allowance you had left.
![]() HOODIE: SEW PIECES TOGETHER
HOODIE: SEW PIECES TOGETHER
3.
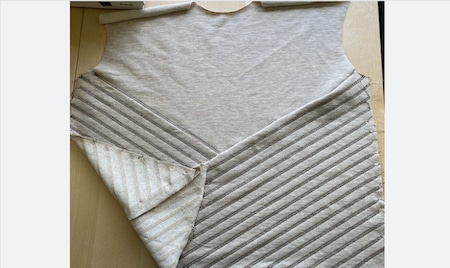
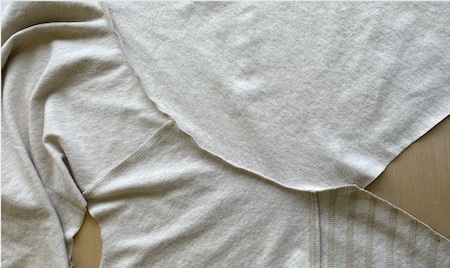
Pin the front right side to the top of the hoodie right sides together, following the markings.
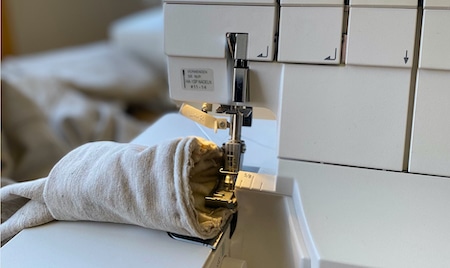
Sew with a 4-thread overlock stitch.
Iron the seam by pressing toward the customised part.
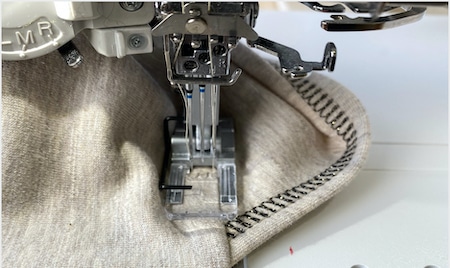
On the right side up, join the pieces on this seam by sewing a triple top cover stitch with the decorative thread.
Lay the last part of the front right side up by following the markings.
Sew with a 4-thread overlock stitch.
Iron the seam by pressing toward the customised part.
On the right side up, join the pieces on this seam by sewing a triple top cover stitch with the decorative thread.
4.
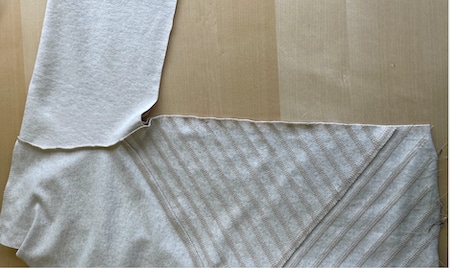
Pin the shoulder seams, right sides together, and sew with a 4-thread overlock stitch, iron by pressing the seams toward the back.
Lay the sleeves over the armhole markings and sew in the same way.
5.
Pin the side seams from the bottom of the sweatshirt to the edge of the sleeves and sew with a 4-thread overlock stitch.
To avoid excess thickness and offsets, push the armhole seams (under the arm) in the opposite direction.
![]() ASSEMBLE HOOD AND CUFF
ASSEMBLE HOOD AND CUFF
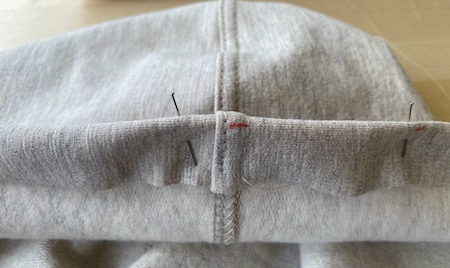
6.
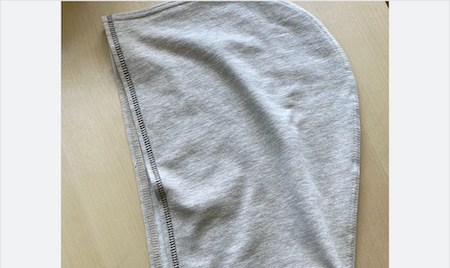
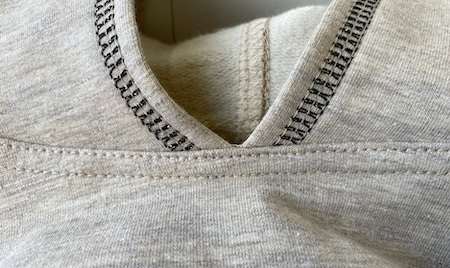
Sew the middle-back seam of the hood with a 4-thread overlock stitch. Iron the seam by folding it on one side. Right side up, topstitch with a wide double cover stitch. Fold the hem of the edge, iron it to mark it out. Sew your hem with the triple top cover stitch and your decorative thread.
7.
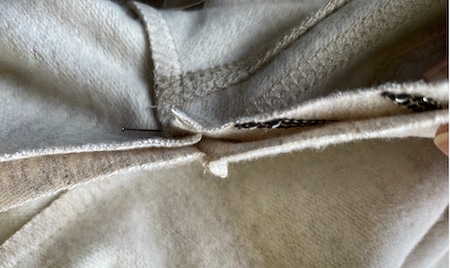
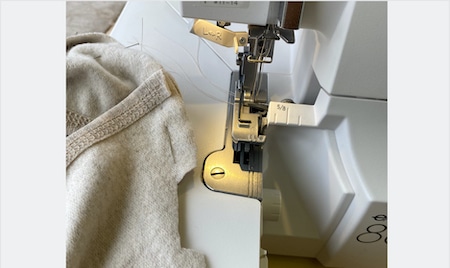
Lay the hood over the collar right sides together, following the middle-front and middle-back seam markings of the shoulders. Over the middle front, the two edges of the hood should slightly cross. To sew a flatlock stitch with an overlock machine, clip the cutting value over a length of approx. 3 cm (1.24 inches). Insert your fabric under the presser foot from the side and hold yourself steady against the blade. At the end of your seam, sew an overlay over the start of your seam. Raise your presser foot and gently pull to release the threads.
8.
Iron the seam and topstitch with a wide double cover stitch.
9.
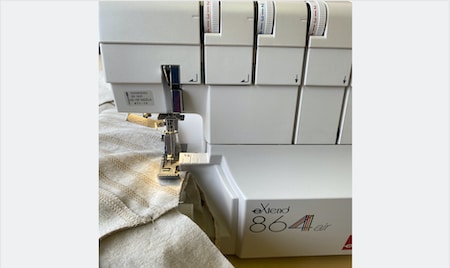
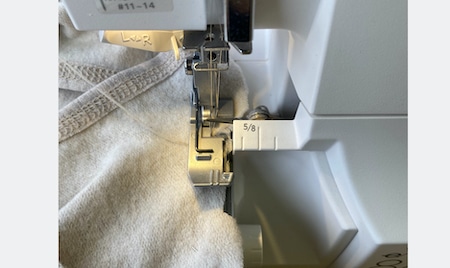
Sew the side seam of the cuff s with a 4-thread overlock stitch.
Notch the inside corner over 1 cm (.4 in). While sewing, create a small fold at the height of your notch so that your fabric is positioned in a straight line in front of your presser foot.
10.
Fold the cuff inside out, hold the two layers together with a basting stitch. At the bottom of the sleeve, create a gathering stitch: 4-thread overlock – stitch length 4 – differential 2. Fold the bottom of the sleeve in half widthwise and create a marking. Repeat for the cuff. Lay the seams of the sleeves and cuffs and lay the markings on top of each other, spreading the excess fabric of the sleeve. On the gathered stitch side, sew with the 4-thread overlock stitch, pull slightly on the cuff to spread the excess if necessary.

Congratulations, your hoodie is finished.
If you want to create the complete sportswear set, you will find the jogger pant tutorial in the Inspiration section of our website.
© Elna International Corp. SA, all rights reserved
Copyright
The authorization to use this documentation is hereby granted exclusively for non-commercial use. The contents of this documentation are the sole property of Elna International Corp. SA. This documentation shall not in any way constitute a right to transfer any rights with respect to copyrights of Elna International Corp. SA to the user or to third parties.